OBS-old
External Broadcasting Software
You are be able to stream on MyFreeCams.com using RTMP External Broadcasters such as OBS, SplitCam, XSplit, Wirecast, ManyCam, etc.
Broadcasting Methods Comparison
Sidekick Plugin
Sidekick is a WebRTC broadcasting plugin for OBS that delivers high quality video with very low latency for all viewers (including mobile).
Please visit the Sidekick Wiki page for instructions on how to set up SideKick.
Getting Started
A hard-wired Ethernet connection is strongly recommended (rather than WiFi)
Configuration
Output, Video, Audio, Advanced Settings
Add a Webcam Source
Windowed Projector Preview
Plugins
Configuration

- Download and install OBS from https://obsproject.com
- Do not run the Auto-Configuration Wizard
- macOS: unidentified developer notice
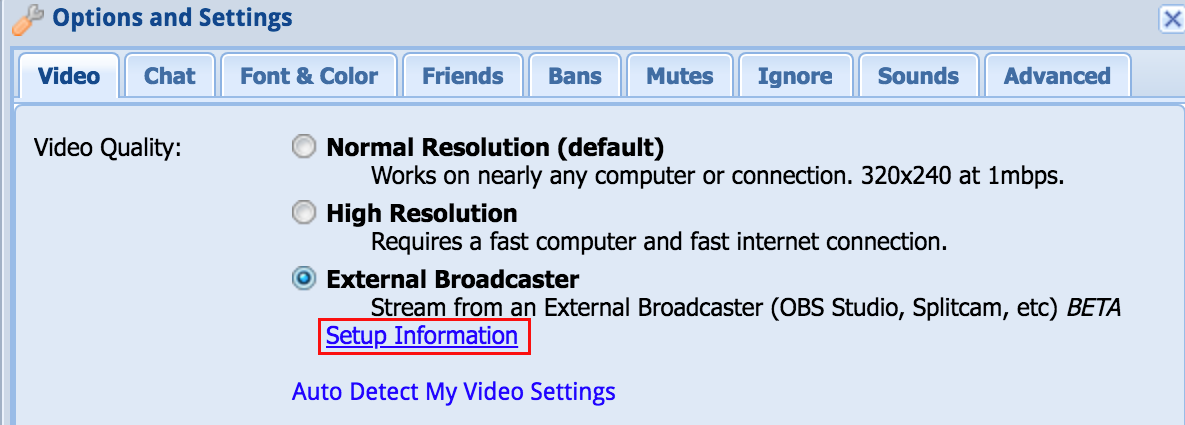
- In the Model Web Broadcaster (MWB) click Options in the bottom-left corner
- Select External Broadcaster and click Setup Information
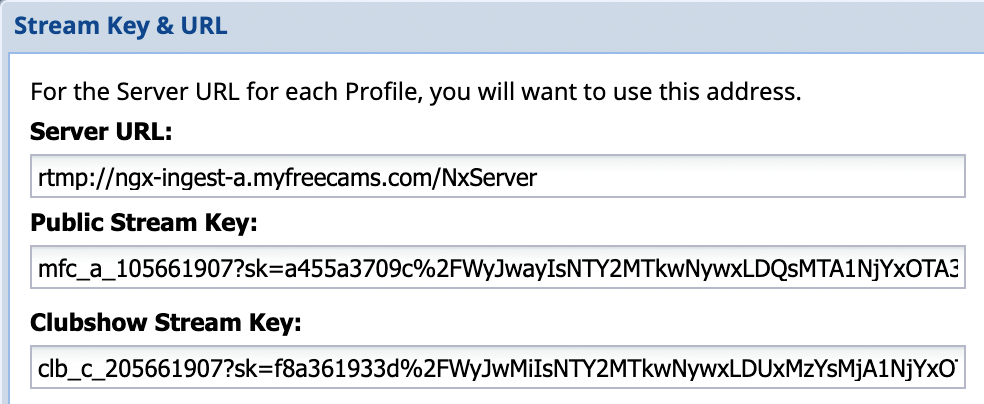
- Click on Server URL to copy the Server URL to the clipboard
- Launch OBS. Click Settings and select the Stream tab
- Change the Service to Custom...
- Paste the Server URL from the MWB into the Server box in OBS
- Go back to the MWB and copy the Public Stream Key and paste into the Stream Key box in OBS
Club Shows
- For club shows, duplicate your OBS profile (top menu bar: Profile > Duplicate), then copy the Clubshow Stream Key from the MWB into the Stream Key box in OBS Settings > Stream.
- Note: The Stream keys for both your public shows and club shows are linked to your model account's password. This means that if you change your password, or if Support resets your password for you for any reason, your Stream keys will automatically be regenerated as well. Remember to update your OBS profiles with your new stream keys anytime your password changes.
Output, Video, Audio, Advanced Settings
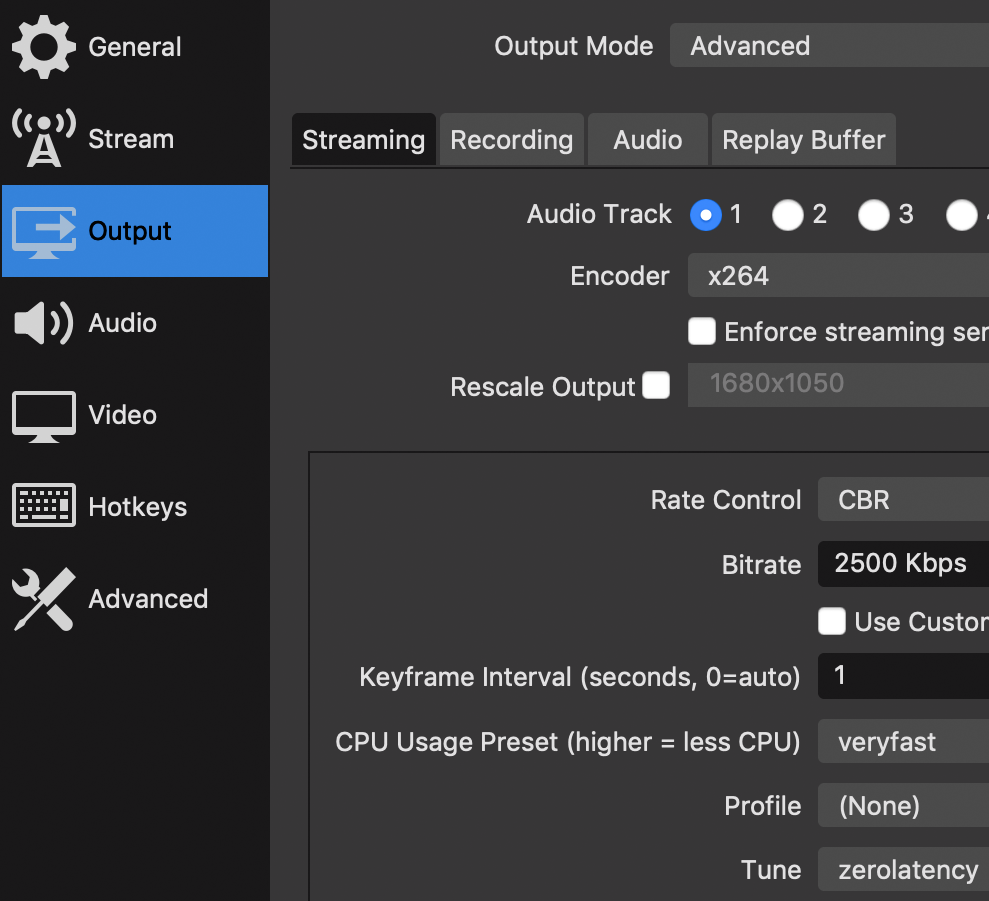

Output
| Output Mode | Advanced |
| Encoder | x264 |
| Rate Control | CBR |
| Bitrate (720p / 1080p) | 2500 / 5500 |
| Keyframe Interval | 1 |
| CPU Usage Preset | veryfast |
| Profile | (none) |
| Tune | zerolatency |
Audio
| Sample Rate | 48 kHz |
| Channels | Stereo |
| Mic/Auxiliary Audio | Blue Yeti or Logitech C922 (example) |
| choose your highest quality microphone | |
| (the one closest to your mouth) |
macOS: Capture desktop/application audio
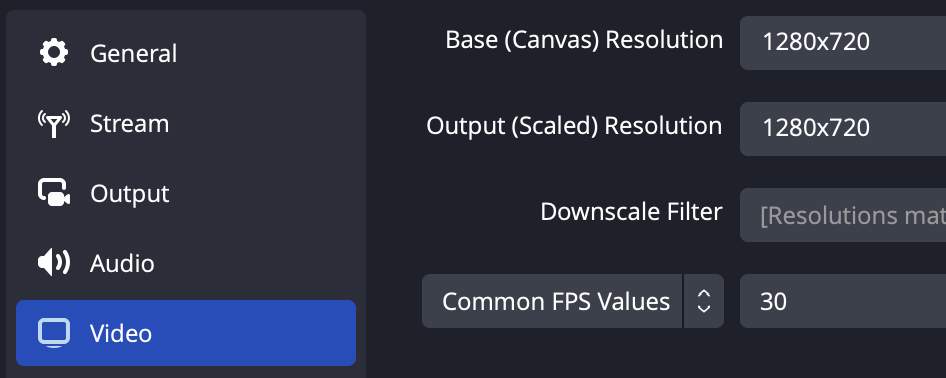
Video (HD 720p)
| HD 720p | |
| Base (Canvas) Resolution | 1280 x 720 |
| Output (Scaled) Resolution | 1280 x 720 |
| Common FPS Values | 30 |
Video (HD+ 1080p)
Do not attempt 1080p unless you have a desktop computer (or powerful laptop), a wired (Ethernet) internet connection with 12+ Mbps upload bandwidth, and have successfully broadcast using the HD 720p settings.
| HD+ 1080p | |
| Base (Canvas) Resolution | 1920 x 1080 |
| Output (Scaled) Resolution | 1920 x 1080 |
| Common FPS Values | 30 |
Advanced
| Process Priority [Windows] | Normal or Above Normal |
| Color Format | NV12 |
| YUV Color Space | 709 |
| YUV Color Range | Partial |
Add Webcam Source
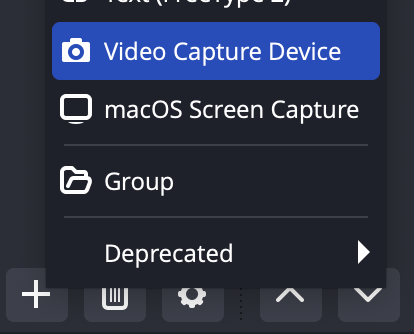
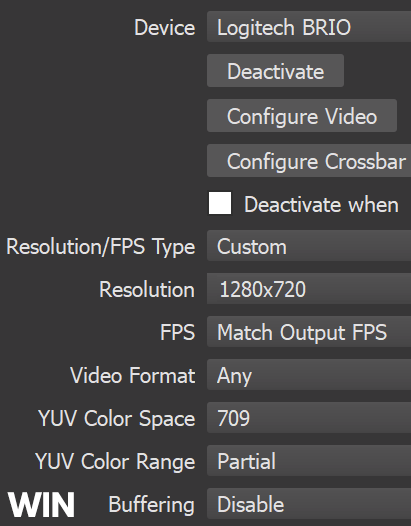
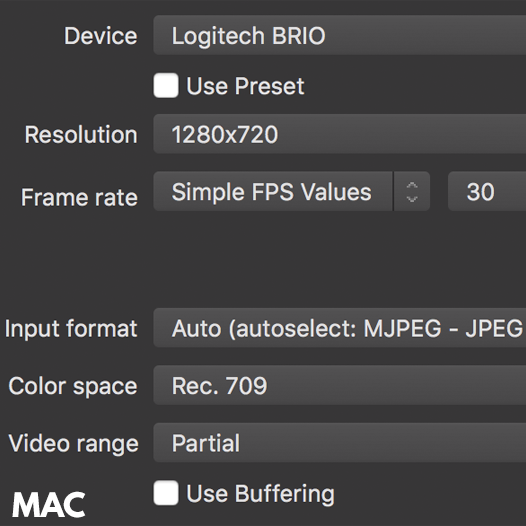
- Click + (plus symbol) at the bottom of the Sources panel and select Video Capture Device
- Enter a name for your webcam (such as C920 or BRIO) and click OK
- Click the Device drop-down menu and select your webcam
- Use the following settings:
Webcam Properties
Windows
| Resolution/FPS Type | Custom |
| Resolution (720p / 1080p) | 1280 x 720 / 1920 x 1080 |
| FPS | Match Output FPS |
| Video Format | Any |
| YUV Color Space | 709 |
| YUV Color Range | Partial |
| Buffering | Disable |
Mac
| Use Preset | ▢ unchecked |
| Resolution (720p / 1080p) | 1280 x 720 / 1920 x 1080 |
| Frame Rate | Simple FPS Values - 30 |
| Input Format | Auto |
| Color Space | Rec. 709 |
| Video Range | Partial |
| Use Buffering | ▢ unchecked |
Video Preview

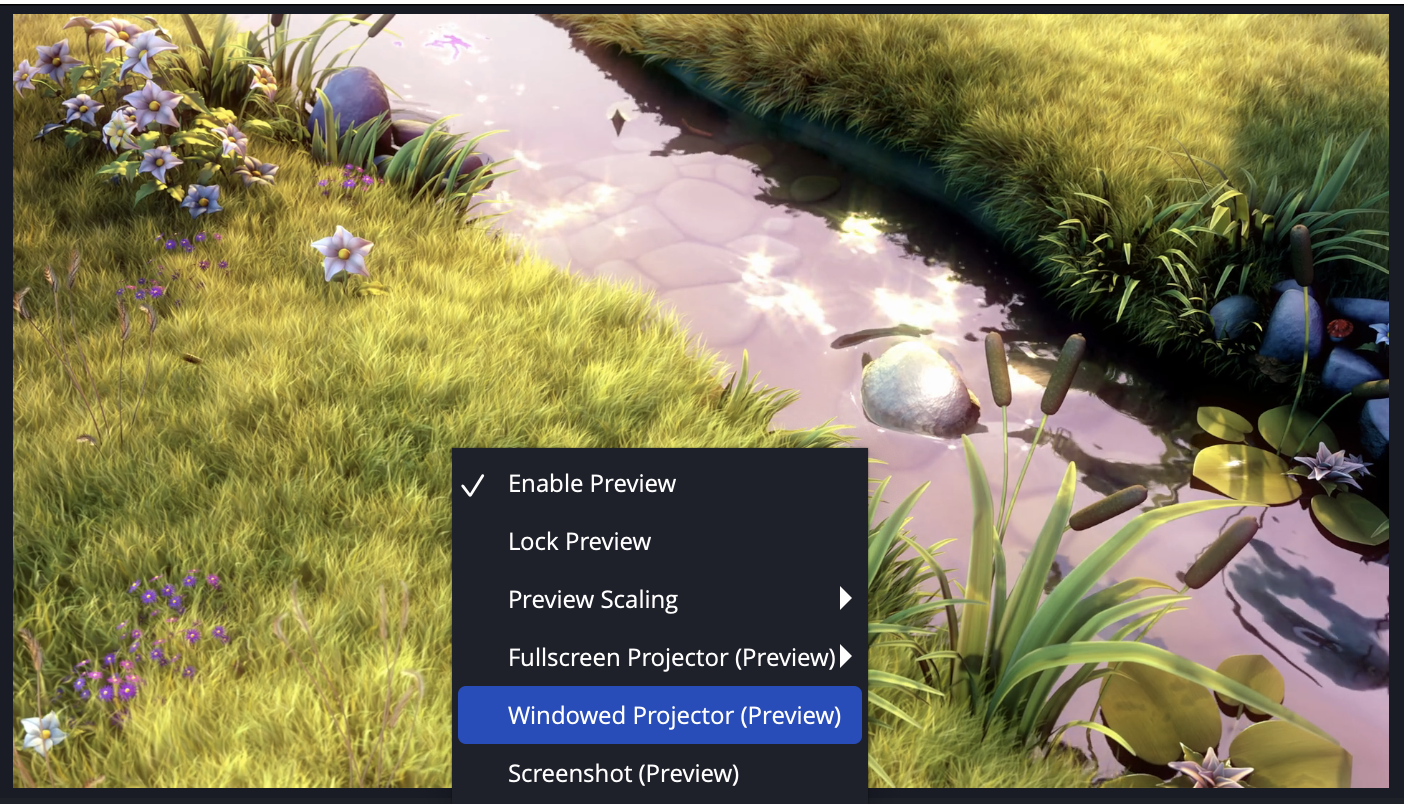
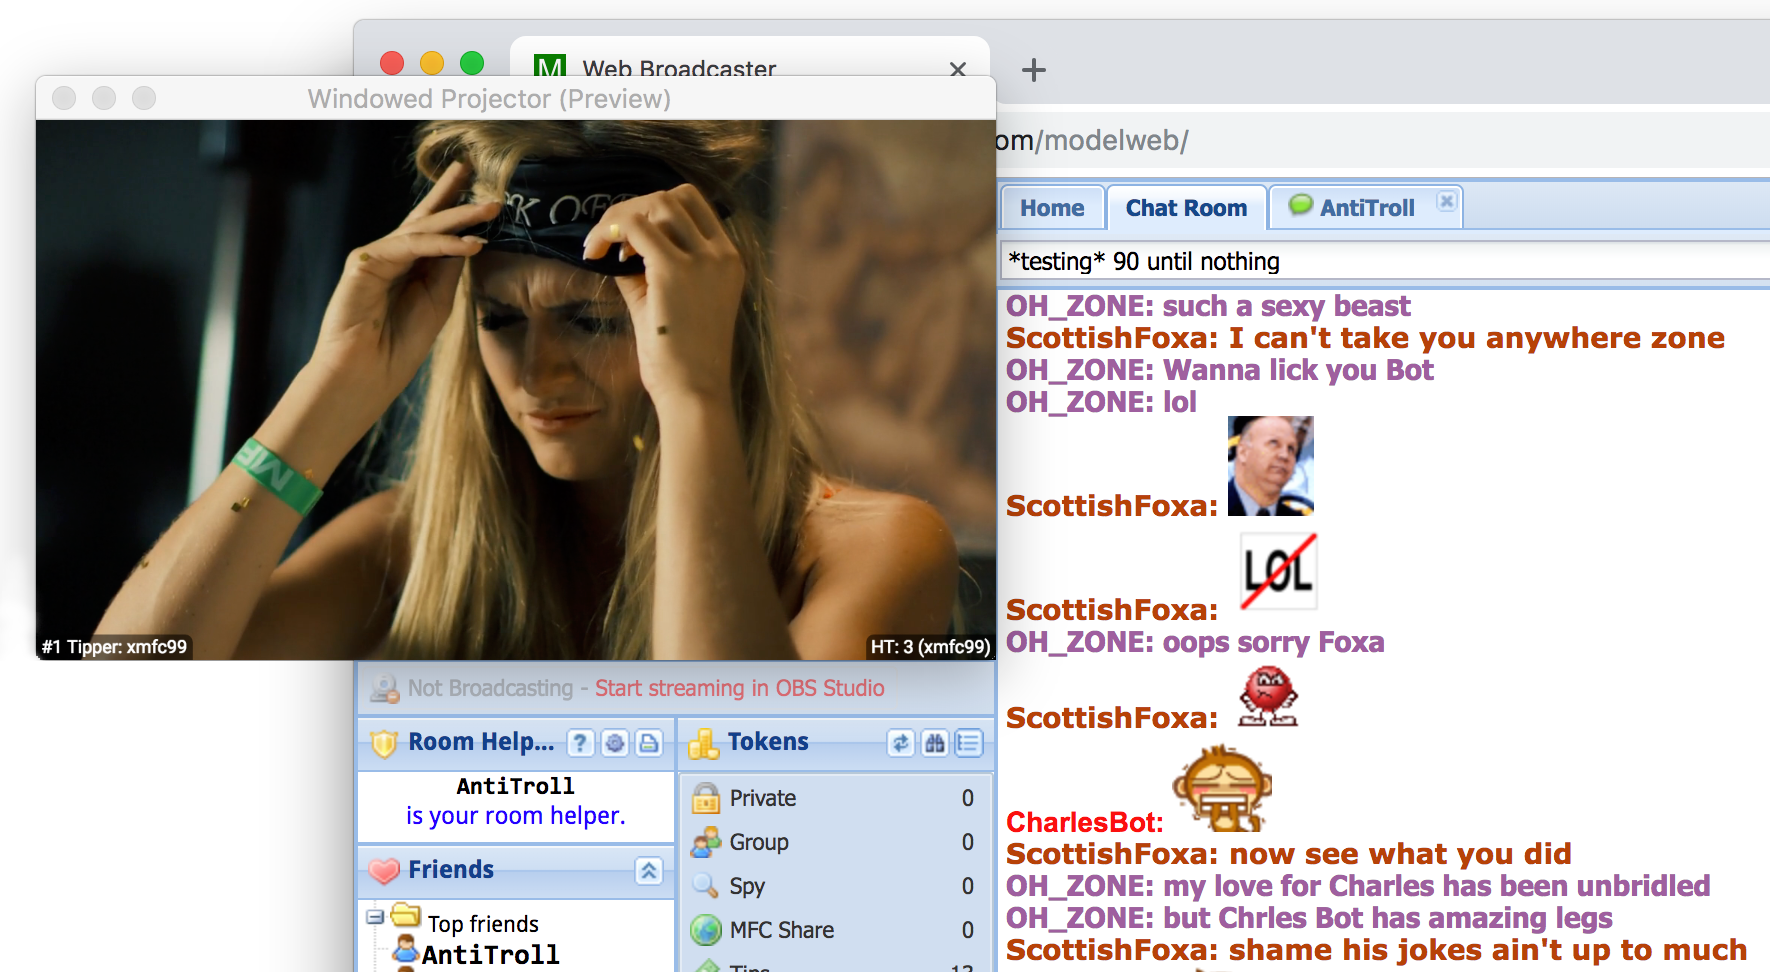
When using OBS, the video preview in the Model Web Broadcaster is disabled and will show "LIVE" when broadcasting. Here's an alternative method to placing OBS alongside your web browser:
- In OBS, click Settings and select the General tab. In the Projectors section select Make projectors always on top and Save projectors on exit
- Right click the video preview in OBS and select Windowed Projector (Preview)
- Drag the Windowed Projector to the top left corner of the Model Web Broadcaster (or anywhere) and resize as desired
Having two previews turned on may result in missed frames due to rendering delays. To prevent this:
- Right click the video preview in the main application and select ✓Enable Preview to disable the preview
Plugins
CharlesBot Widgets
- Send a PM to CharlesBot with: !obs
- You may do this by entering the following command in your chat room:
- /pm CharlesBot !obs
MFC Alerts
- Add the MFC user mfcalerts to your Top Friends list (in order to receive your temporary password by PM).
- You may do this by first entering the following command in your chat room:
- /friend mfcalerts
- In your Friends List, click on mfcalerts.
- In the Info Panel, select Actions → Make Top Friend
- Send a PM to mfcalerts with: signup
- A temporary password with instructions will be PMed to you.
Reset Settings
- macOS: OBS Settings Reset App
Requirements
| Minimum | Recommended | |
| Processor | Intel i5 or AMD 6-core | Intel i7 or AMD 8-core |
| Internet | 5+ Mbps upload bandwidth | 12+ Mbps upload bandwidth |
| Memory | 4 GB RAM | 8+ GB RAM |
| OS | Windows 8 / macOS 10.13 | Windows 10 / macOS 10.14 |
| Graphics | DirectX 10.1 / OpenGL 3.2 GPU | DirectX 10.1+ / OpenGL 3.2+ GPU |
A hard-wired Ethernet connection is strongly recommended (rather than WiFi)
Windows 10 users: If you have received the Windows 10 1809 update, make sure that Game Mode is disabled (PC Settings / Gaming). If Game Mode is enabled, Windows reduces GPU priority for OBS, which can cause frame lag in your stream.
More Information
- Troubleshooting Guides
- Known Conflicts
- Keyboard Shortcuts
- Understanding The Audio Mixer
- Audio Filters
- Windows 10 App Volume Device Preferences
- Dropped Frames And General Connection Issues
- What are dropped frames and why do they happen?
Mac Install Notes
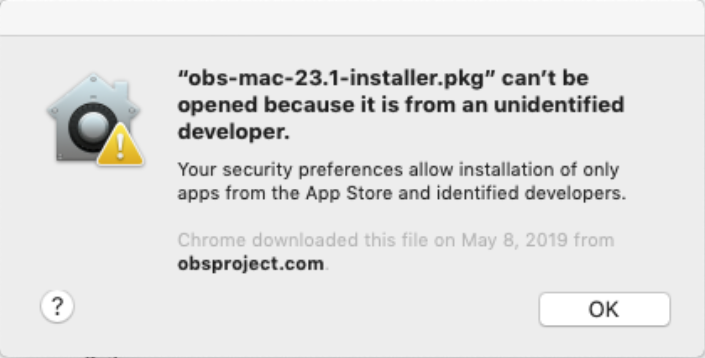
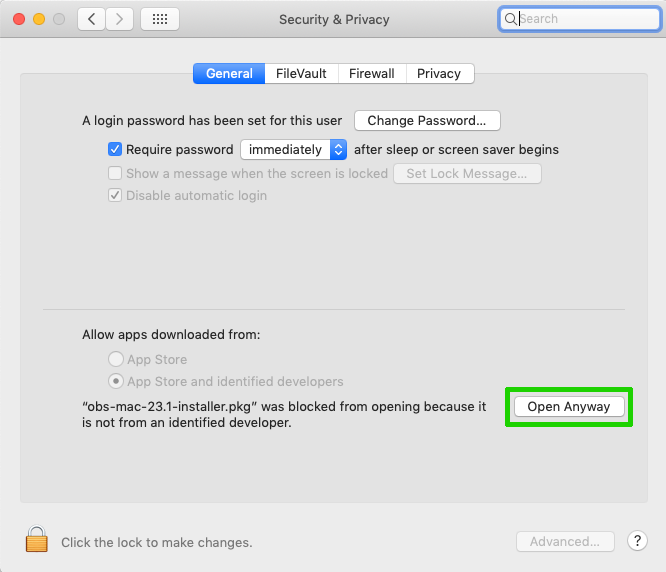
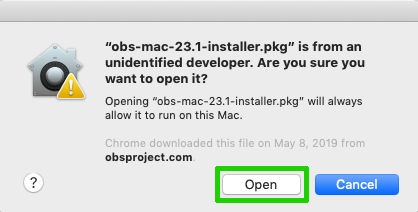
If you receive a notice, "... can't be opened because it is from an unidentified developer":
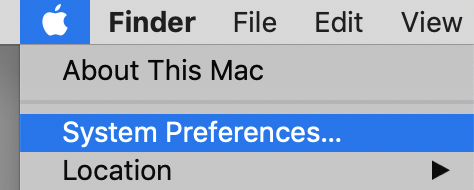
- Open System Preferences ( > System Preferences...)
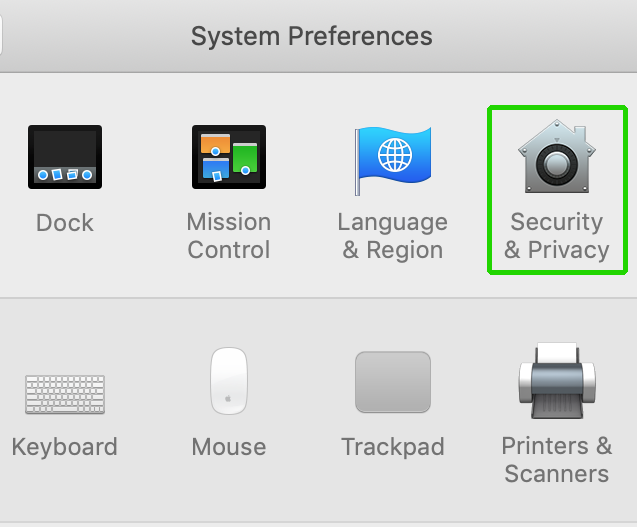
- Select Security & Privacy
- Click the Open Anyway button (in the General section)
- Select Open in the pop up window