Loopback
Jump to navigation
Jump to search
Mac: Capture application audio using Loopback
In the Mac version of OBS, directly capturing "Desktop" or "Application" audio is not possible without using a third-party application. Otherwise, the only way to deliver music to your viewers is by using your microphone to capture the sound (music) being played by one or more speakers in your room, which decreases the sound quality of the music heard by your viewers.
The easiest application to use is Loopback ($99), which captures the music you are playing at the source (Spotify, iTunes, Chrome) and sends it directly into OBS. Another similar application is BlackHole (free).
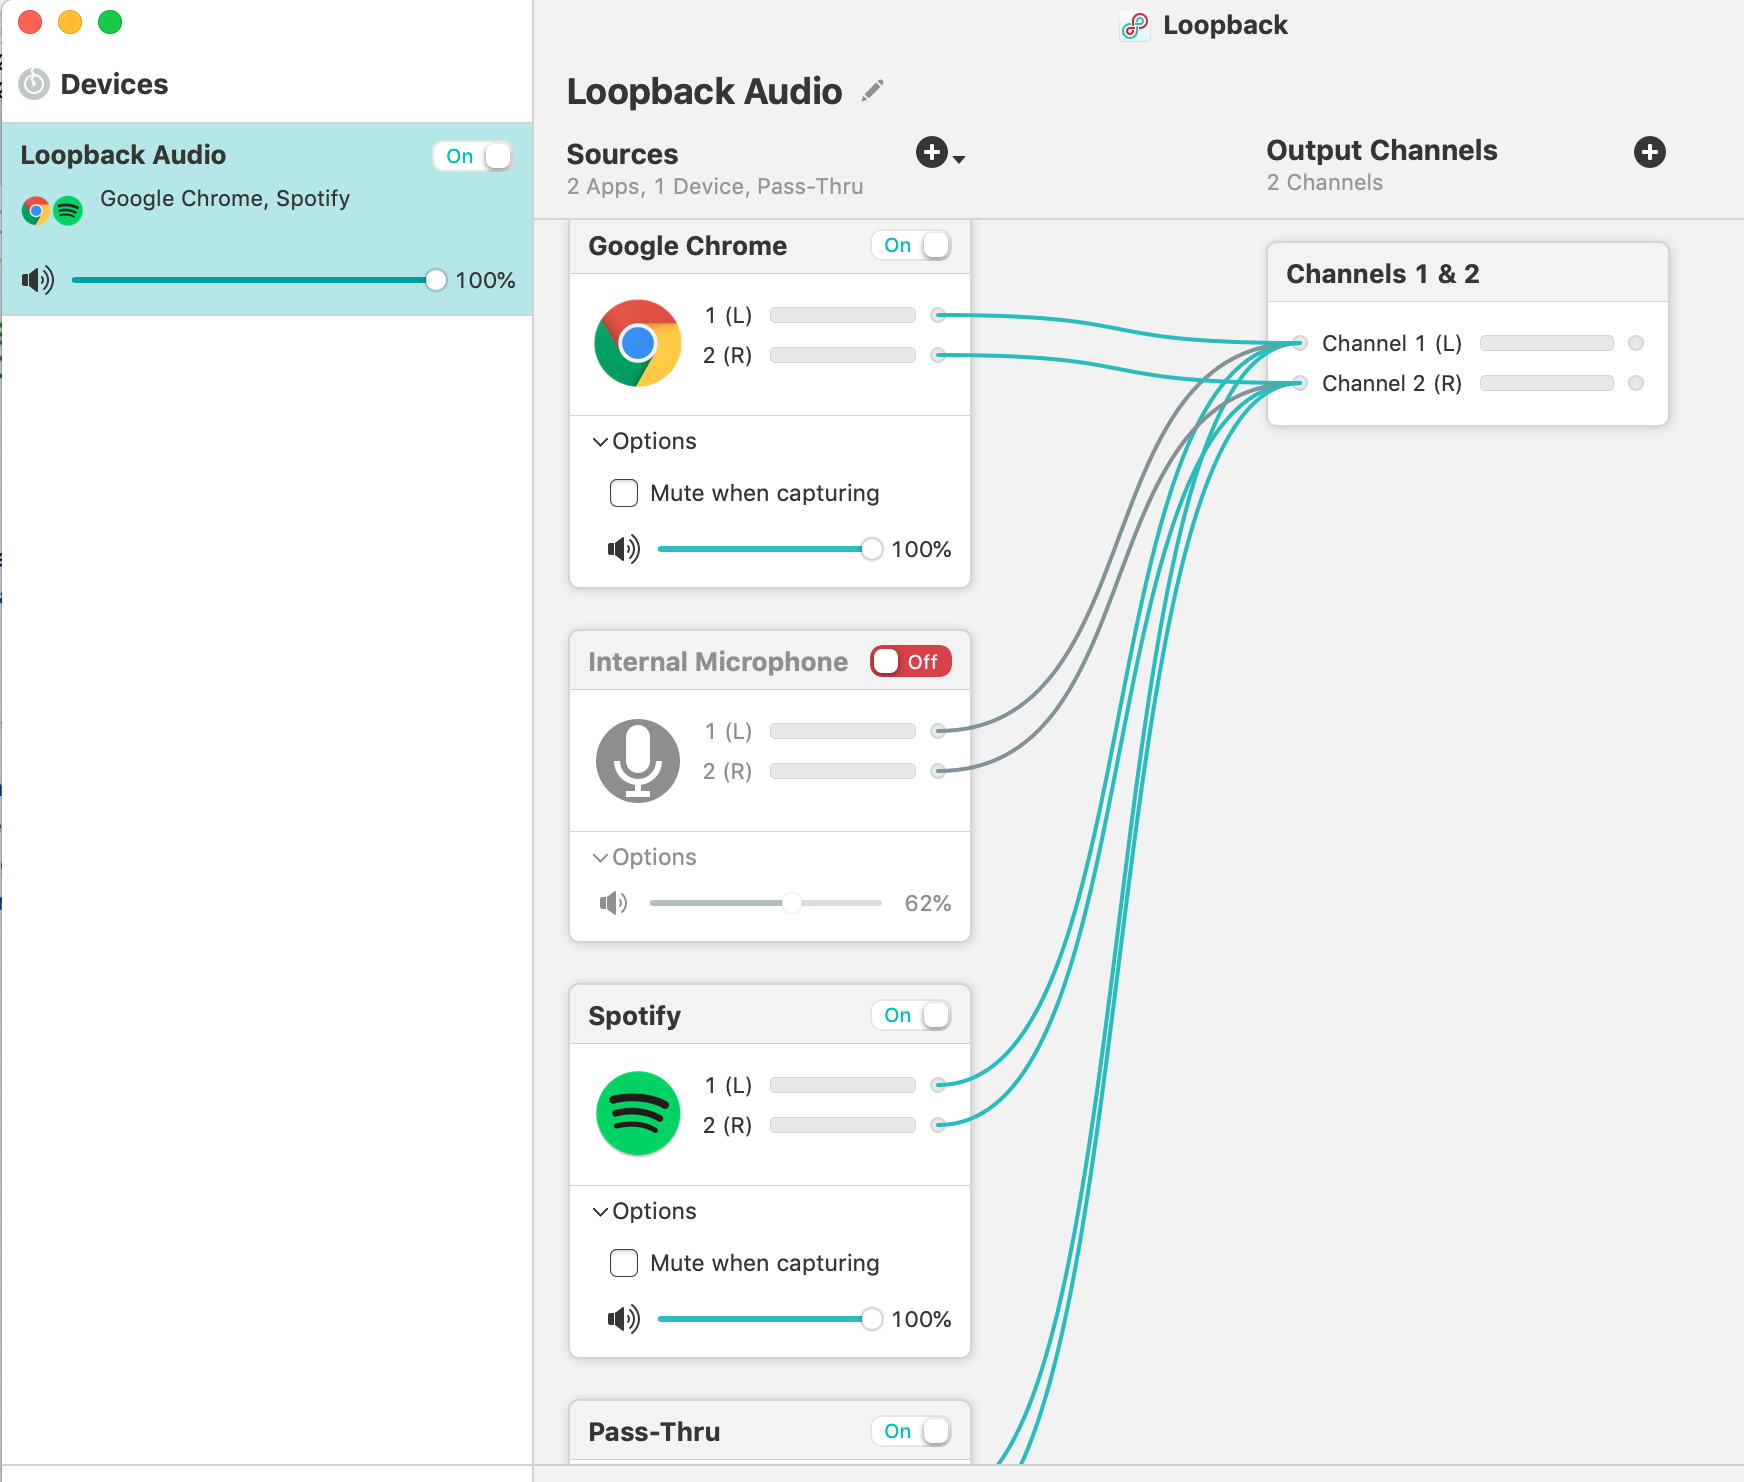
Loopback Configuration

- Turn on the Loopback Audio Device (left column)
- Add all desired audio Sources (such as Spotify for music, Chrome for tip sounds)
- Expand Options for each source and uncheck Mute when capturing
- Turn off ALL microphones (including the one you broadcast with)
- Only your music playback apps (plus Chrome for tip sounds), and Pass-Thru should be turned on
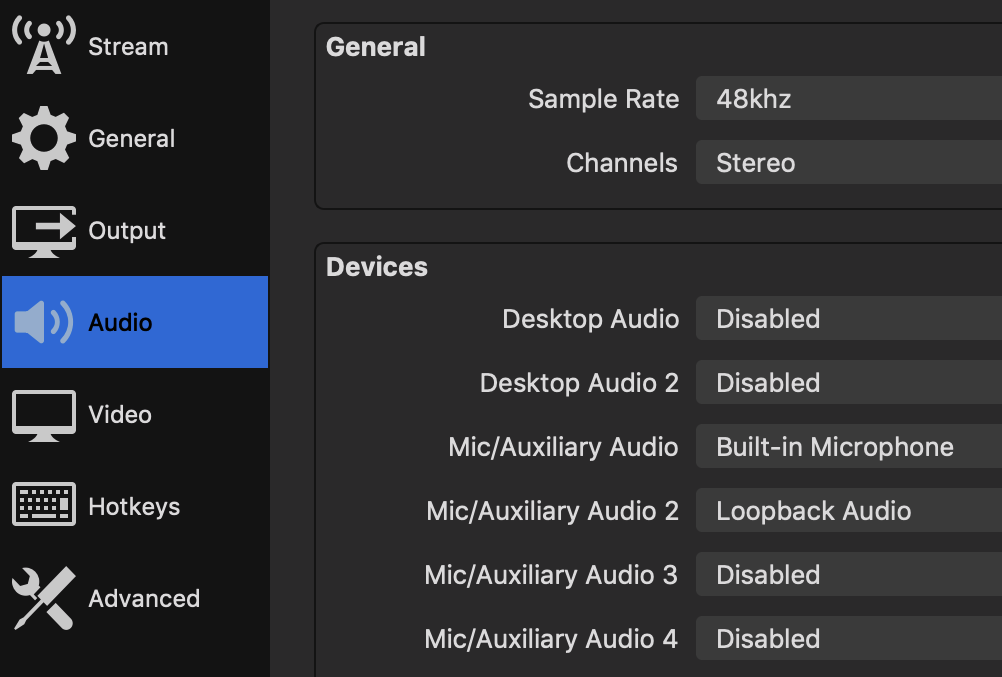
OBS Audio Settings

| Mic/Auxiliary Audio | Blue Yeti or Logitech C922 (example) |
| choose your highest quality microphone | |
| (the one closest to your mouth) | |
| Mic/Auxiliary Audio 2 | Loopback Audio |
- Adjust your keyboard volume controls and/or application volume control to bring music volume to an acceptable level for you (lower is better)
- Keep speakers & mic as far apart as possible (or use earphones) to reduce/eliminate echo/feedback
- Use the audio level slider for Mic/Aux Audio 2 (in the OBS mixer) to set desired music volume for your viewers.
- Keyboard/system volume has no effect on the music volume level for your viewers, only for you.
- Increasing/decreasing application volume (in the application itself) will make that app's sound output louder/quieter for both you and your viewers.
- Increasing/decreasing an application's volume in Loopback will make that app's sound output louder/quieter for viewers (no change for you).