XSplit
Jump to navigation
Jump to search
XSplit Broadcaster
XSplit is an External RTMP Broadcasting application for Windows.
Note: The free version of XSplit Broadcaster is limited to 1280 x 720 @ 30 fps and mono channel audio (96 kbps).
Requirements
| Minimum | Recommended | |
| Processor | Intel i5 or AMD 6-core | Intel i7 or AMD 8-core |
| Internet | 4+ Mbps upload bandwidth | 6+ Mbps upload bandwidth |
| Memory | 8 GB RAM | 8+ GB RAM |
| OS | Windows 7 SP1 (64 bit) | Windows 10 (64 bit) |
| Graphics | DirectX 10.1 GPU | DirectX 10.1+ GPU |
A hard-wired Ethernet connection is strongly recommended (rather than WiFi)
RTMP Streaming Instructions

- Download (and install) XSplit from https://www.xsplit.com/broadcaster
- In the Model Web Broadcaster (ModelWeb) click Options in the bottom-left corner
- Select External Broadcaster and click Setup Information
- Copy the Server URL to your clipboard
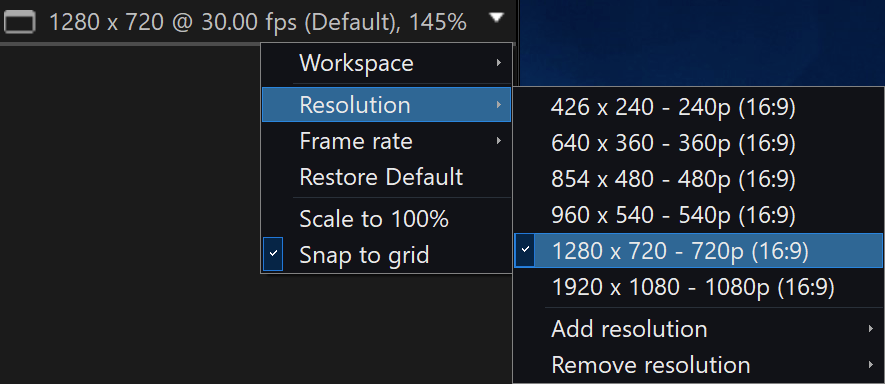
- Launch XSplit. In the top right corner, change the stage Resolution to 1280 x 720 and Frame Rate to 30 fps
- Click on the Broadcast menu at the top of XSplit, hover over Set up a new output and click Custom RTMP
- Paste the server URL you copied into the RTMP URL box of the Custom RTMP Properties panel
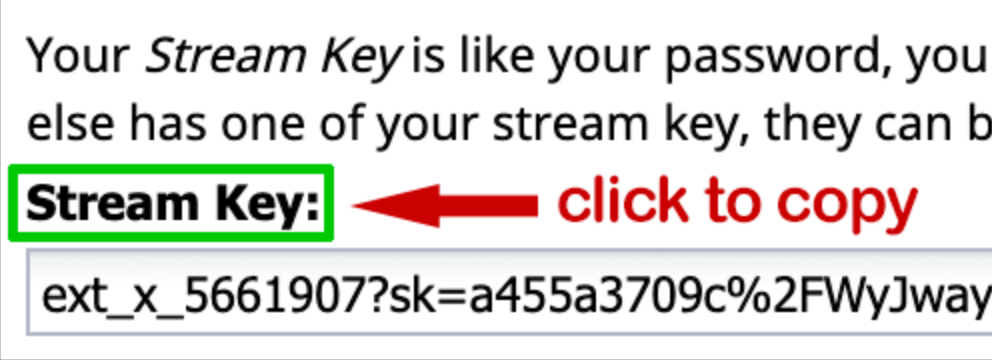
- Go back to the ModelWeb and copy the Stream Key and paste into the Stream Name box in XSplit
- See Custom RTMP Properties (below) to configure the remaining settings
Custom RTMP Properties
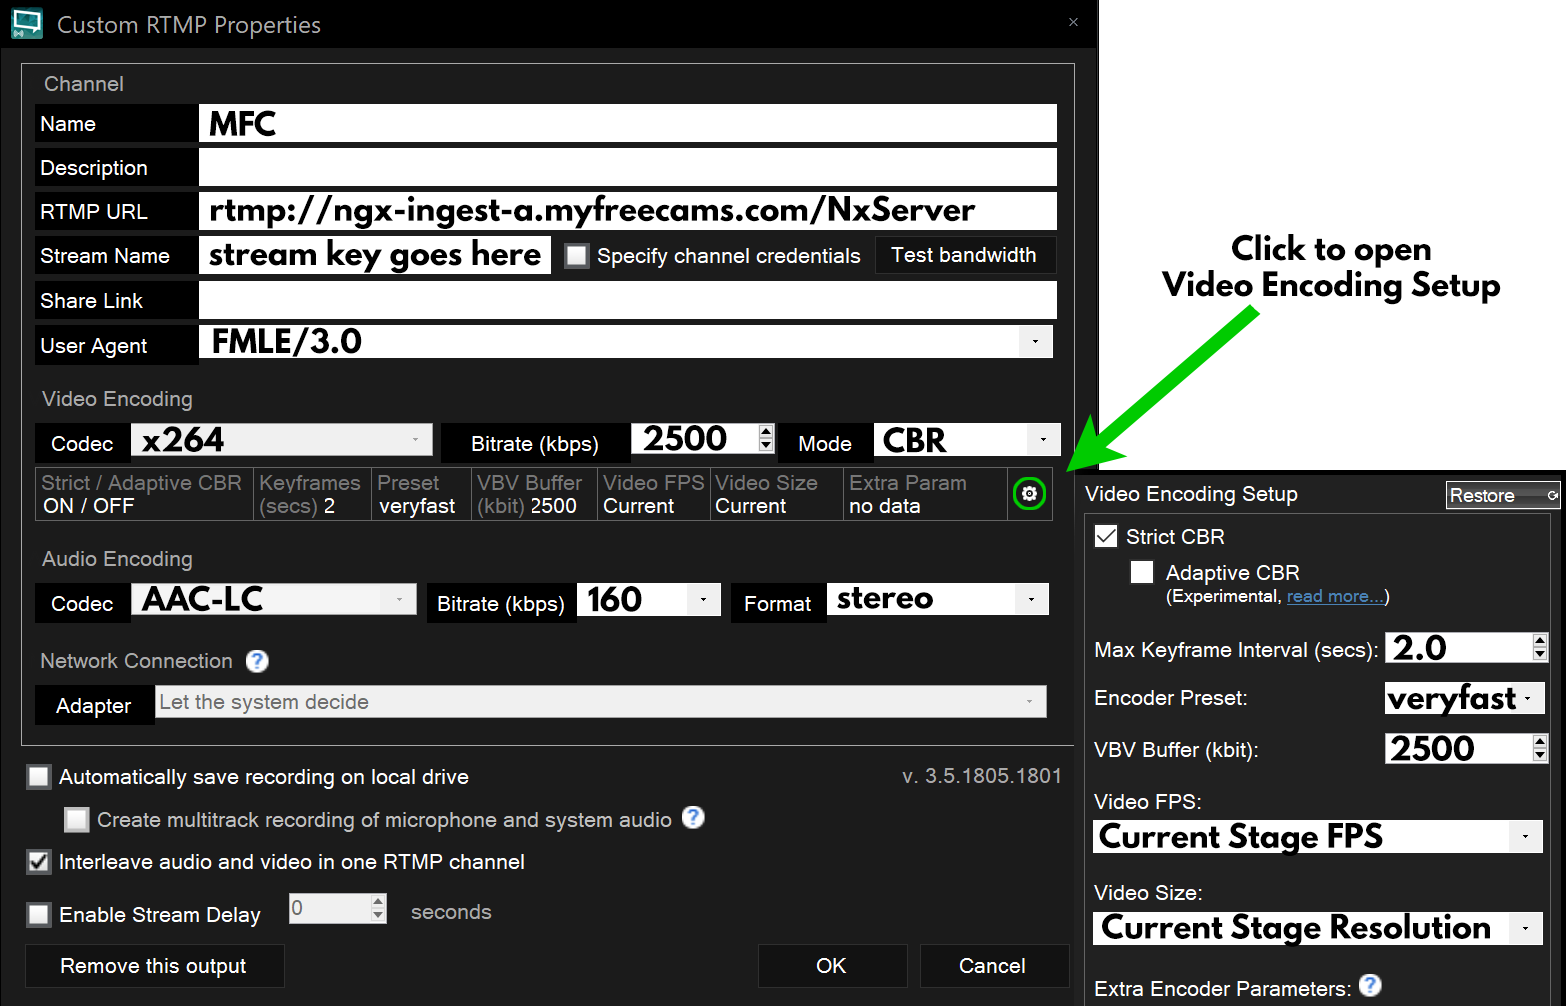
| Name | MFC |
| RTMP URL | (Server URL from ModelWeb) |
| Stream Name | (Stream Key from ModelWeb) |
| User Agent | FMLE/3.0 |
| Codec | x264 |
| Bitrate | 2500 |
| Mode | CBR |
| Strict CBR | ON (checked) |
| Adaptive CBR | OFF (unchecked) |
| Keyframes | 2 |
| Preset | veryfast |
| VBV Buffer | 2500 |
| Video FPS | Current |
| Video Size | Current |
| Codec | AAC-LC |
| Bitrate | 160 |
| Format | stereo |
| Interleave audio & video | checked |
Virtual Plugin Instructions
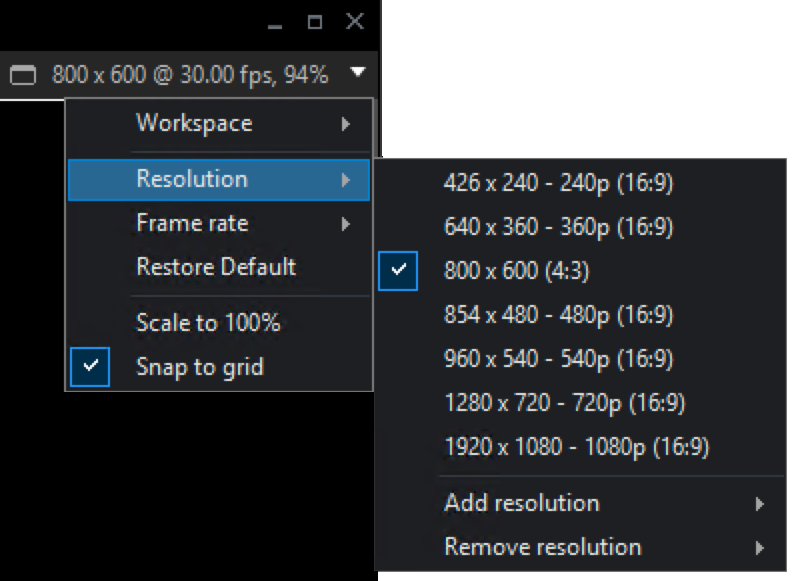
Follow these instructions if you wish to use XSplit to add overlays while broadcasting using the High Resolution or WebRTC video quality setting:
- Download (and install) XSplit from https://www.xsplit.com/broadcaster
- Launch XSplit. In the top right corner, click ▼ and go to Resolution → Add Resolution → Custom Resolution and enter
 1920 for Width, 1080 for Height (WebRTC 1080p)
 1280 for Width,  720 for Height (WebRTC  720p)
  960 for Width,  540 for Height (WebRTC  540p)
- Change the Stage Resolution and Frame Rate (by clicking the same ▼ in the top right corner) to:
 1920 x 1080 @ 30 fps (WebRTC 1080p)
 1280 x  720 @ 30 fps (WebRTC  720p)
  960 x  540 @ 30 fps (WebRTC  540p)
- Follow the instructions below to Add Webcam Source except set the Output Size to match the Stage Resolution
- Leave XSplit running while on cam
- After you are online, click the Cam/Mic Settings button in the lower left corner of the Model Web Broadcaster and change your video source to XSplit
Add Webcam Source
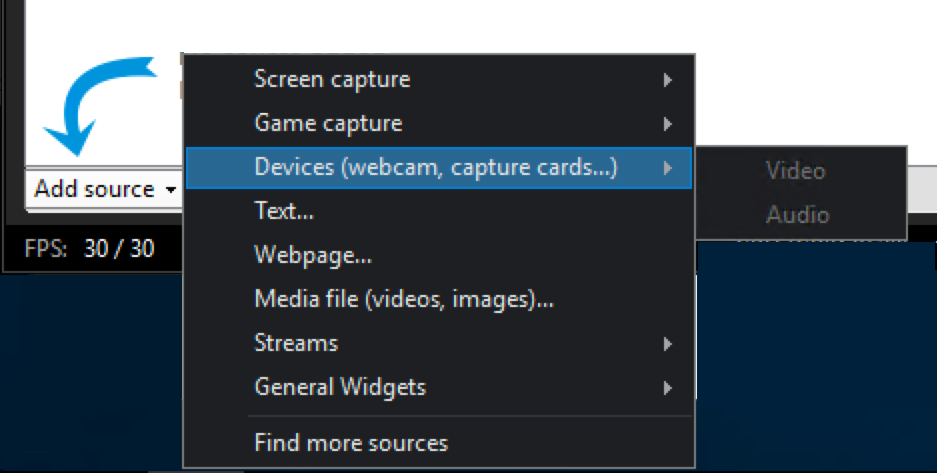
- Click Add source → Devices → Video → (your webcam)
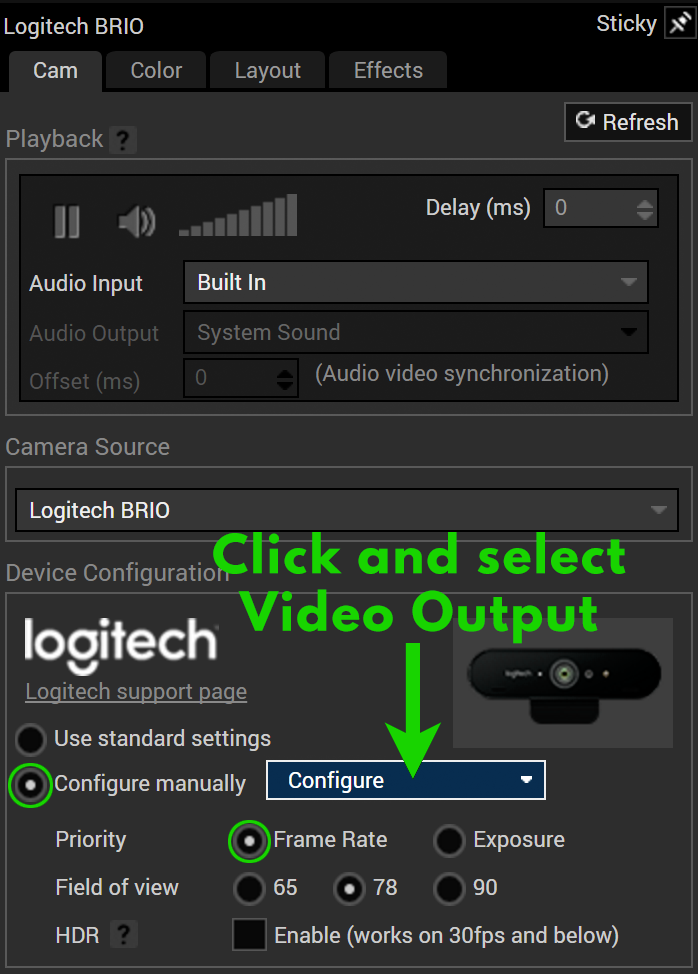
- Select your webcam in the Sources List and click Settings
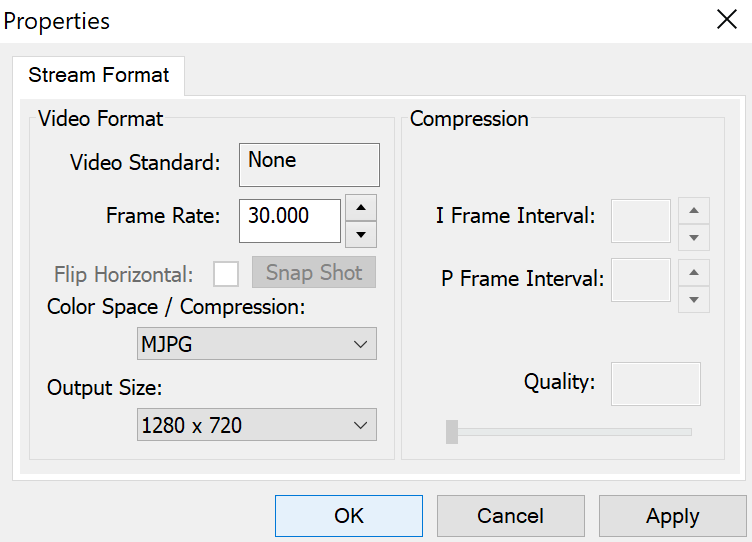
- Output Size: 1280 x 720
- Frame Rate: 30
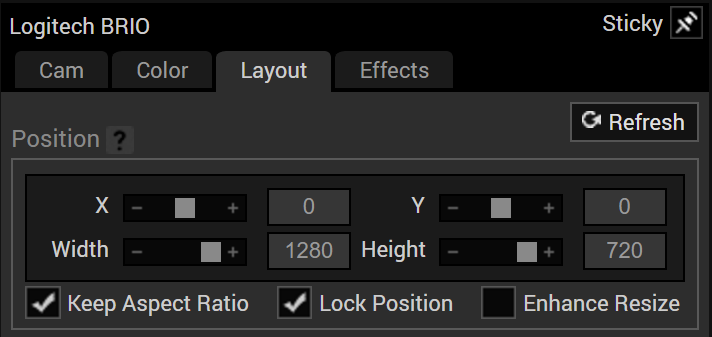
- In the Layout tab make sure that:
- X: 0
- Y: 0
- Width: 1280
- Height: 720
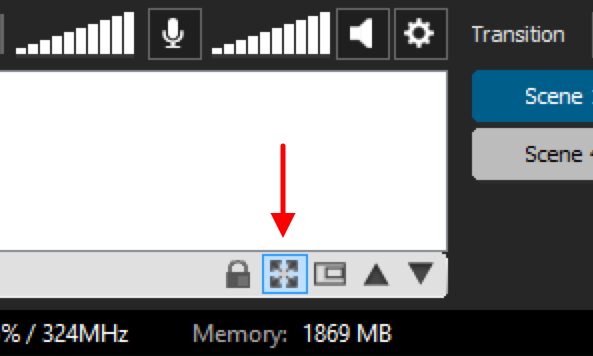
- Click the 'expand-to-fit' button to enlarge the webcam video to fill the workspace
Plugins
CharlesBot Widgets
- Send a PM to CharlesBot with: !obs
- You may do this by entering the following command in your chat room:
- /pm CharlesBot !obs
MFC Alerts
- Add the MFC user mfcalerts to your Top Friends list (in order to receive your temporary password by PM).
- You may do this by first entering the following command in your chat room:
- /friend mfcalerts
- In your Friends List, click on mfcalerts.
- In the Info Panel, select Actions → Make Top Friend
- Send a PM to mfcalerts with: signup
- A temporary password with instructions will be PMed to you.
